Getting the Best out of the MacBook Pro Retina 15 Screen in VMware Fusion

I make no secret of the fact that I am neither a fan of Apple nor a fan of virtualization. But sometimes they make for the best available option. I have recently found myself in such a situation. My current employer, mercifully, allows employees a choice of something other than vanilla Windows machines to work on, and there was an option of getting a MacBook Pro. As you can probably guess from some of the previous articles here, I find the single most important productivity feature of a computer to be the screen resolution, an opinion I appear to share with Linus Torvalds. So I opted for the 15″ MacBook Pro Retina.

Unfortunately, the native Linux support on that machine still isn’t quite perfect. Since speed is not a concern in this particular case, I opted to run Linux using VMware Fusion on OSX. Unfortunately, VMware Fusion cannot handle full 2880×1800 resolution of the display and with lower resolutions running in full screen mode the quality is badly degraded by blurring and aliasing. The solution is to create a custom 2880×1800 mode in /etc/X11/xorg.conf that fits within VMware virtual graphic driver’s capabilities. This took a bit of working out since the mode had to fit within horizontal and vertical refresh rates of the driver and the total pixel clock the driver allows. The following are the settings that work for me:

Section "Monitor"
        Identifier "MacBookPro"
        HorizSync 30.0 - 90.0
        VertRefresh 30.0 - 60.0
        ModeLine "2880x1800C" 358.21 2880 2912 4272 4304 1800 1839 1852 1891
EndSection

Section "Screen"
        Identifier "Default Screen"
        Monitor "MacBookPro"
        DefaultDepth 24
        SubSection "Display"
                Modes "2880x1800C"
        EndSubSection
EndSection

The result is being able to run a full screen 2880×1800 mode, and it looks absolutely superb.

RedSleeve Linux Public Alpha

Here is something that I have been working on of late.

RedSleeve Linux is a 3rd party ARM port of a Linux distribution of a Prominent North American Enterprise Linux Vendor (PNAELV). They object to being referred to by name in the context of clones and ports of their distribution, but if you are aware of CentOS and Scientific Linux, you can probably guess what RedSleeve is based on.

RedSleeve is different from CentOS and Scientific Linux in that it isn’t a mere clone of the upstream distribution it is based on – it is a port to a new platform, since the upstream distribution does not include a version for ARM.

The reason RedSleeve was created is because ARM is making inroads into mainstream computing, and although Fedora has supported ARM for a while, it is a bleeding edge distribution that puts the emphasis on keeping up with the latest developments, rather than long term support and stability. This was not an acceptable solution for the people behind this project, so we set out to instead port a distribution that puts more emphasis on long term stability and support.

More/Better Internal Storage on the Toshiba AC100 – Part 2

Following my research for the previous article about the performance of SD/CF/USB flash modules, the only conclusion I could reach is that most of them are pretty dire. The only notable exception among the SD cards seems to be the latest generation of the SanDisk Extreme Pro (95MB/s) cards that just about managed to squeeze out enough performance on random writes to match a 7200rpm disk. Still, this is pretty dire compared to any reasonable SSD, so I wanted to see what else could be done about installing extra storage with good performance into an AC100.

What I came across is this: SuperTalent RC8 USB stick. It may look like a USB stick, but it is actually a full-on SSD, featuring a SandForce 1200 flash controller. I figured this was worth a shot, even though the4 specifications indicate it is rather large (far too large to fit inside an AC100 in it’s standard form). Stripped out of the casing, however, it looks like RC8 might just be fittable inside the AC100.

This is what I ended up with. There appears to be only one place inside an AC100 where a bare RC8 circuit board could be fitted. You will need the following:

1) P3MU mini-PCIe USB break-out module

2) SuperTalent RC8 USB stick

3) Custom made USB cable (male and female type A USB connectors, some single core wire, and some skill with a soldering iron)

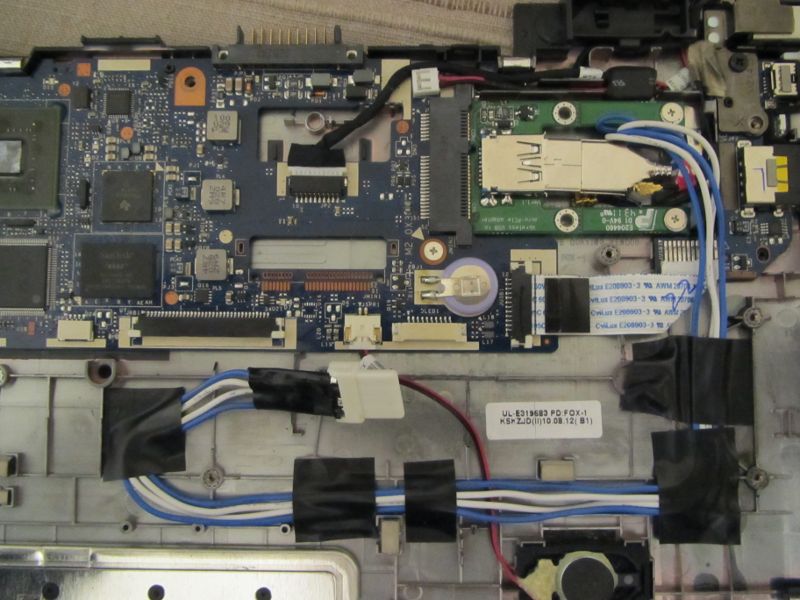
Measure out exactly how long you need the cable to be – there is no room to tuck away excess able inside an AC100. Here is what my cable layout ended up looking like.

AC100 motherboard with P3MU and custom USB cable fitted

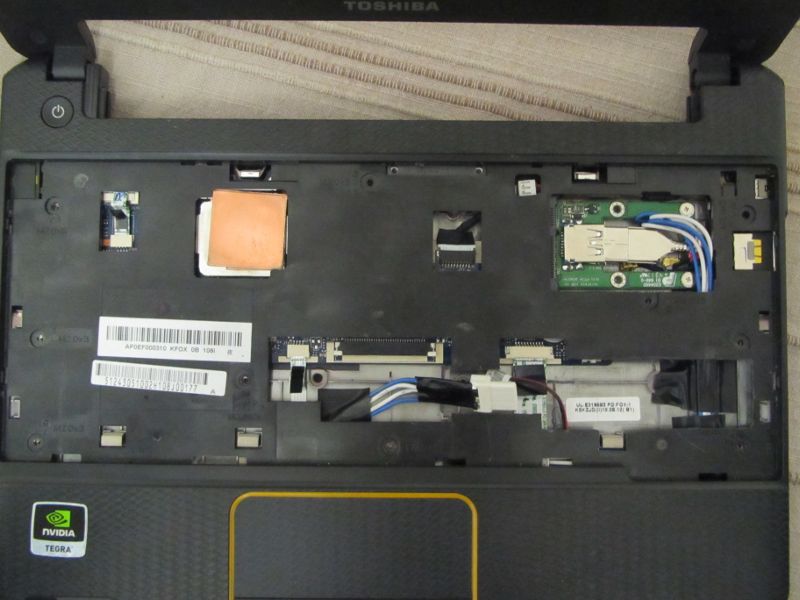
This is what it looks like with the top panel fitted. Note the large cut-out that has been made below the mini-PCIe slot access hole.

AC100 modified to receive RC8 USB SSD

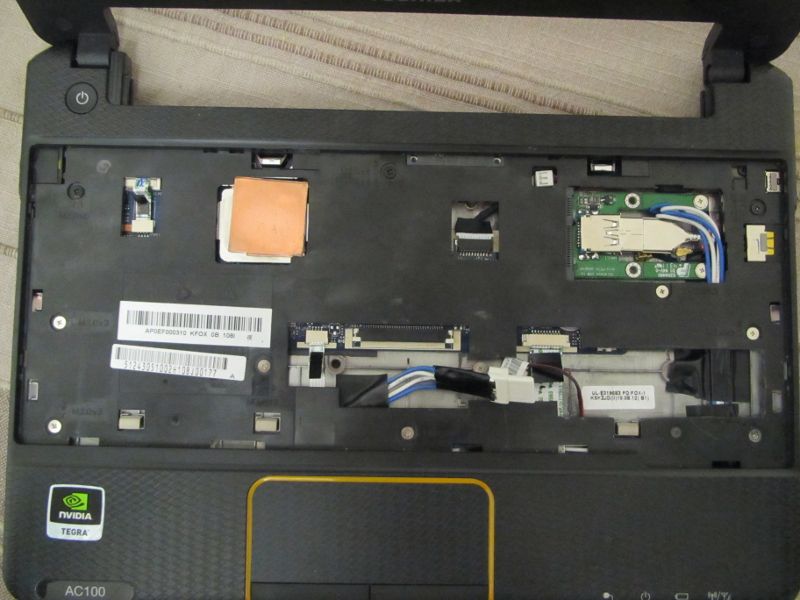
And again with the screws fitted. Note that one of the screw holes is in the area that had to be cut out. This shouldn’t affect the structural integrity of the AC100, though. Also note that the right speaker cable has been re-routed slightly to now go over the LED ribbon cable.

AC100 modified to receive RC8 SSD

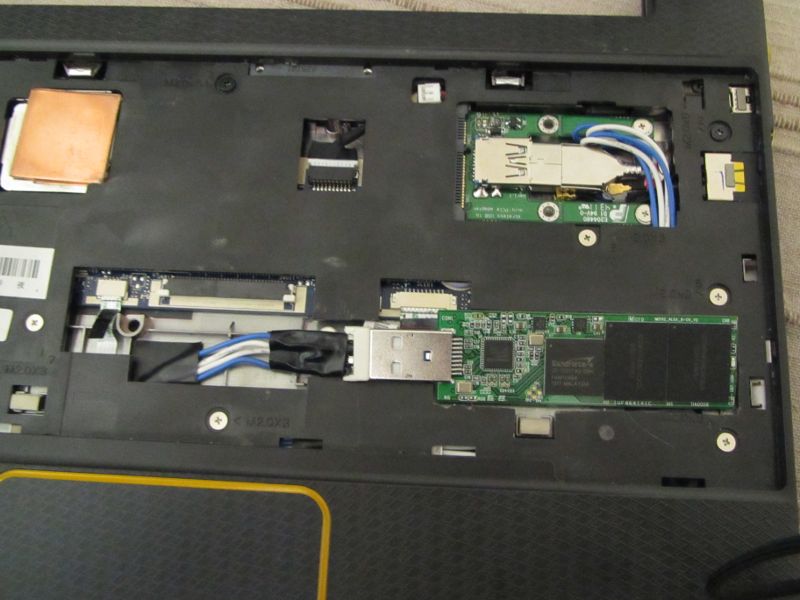
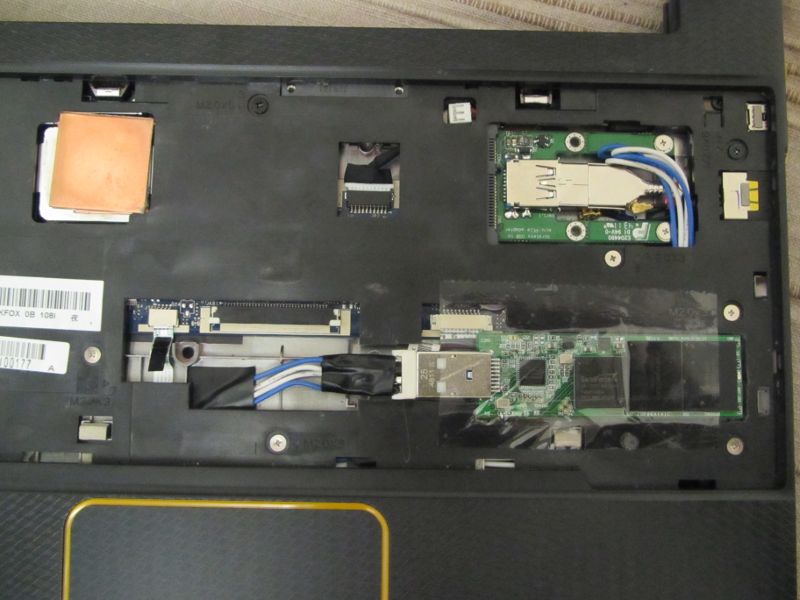
This is what it looks like with the RC8 attached. Now you can see why the cut-out in the top panel was exactly the shape it was – I specifically cut out the minimum possible amount to allow the RC8 to fit.

Toshiba AC100 with the SuperTalent RC8 USB SSD installed

I also put a piece of thin transparent sticky tape over it to hold in in place, just to make sure nothing can short out against the underside of the keyboard.

Toshiba AC100 with the SuperTalent RC8 SSD

And that is pretty much it. Put the keyboard back in and bolt it all together. The metal part of the USB connector will sit a tiny bit above the line of the panel, but the only way you’ll notice it once you put the keyboard back on is by knowing that there is a tiny bulge there.

Your AC100 should now be able to handle ~ 2000 IOPS on both random reads and random writes, along with much better life expectancy that having proper flash management brings.

At this point I would like to point out just how impressed I am with the SuperTalent RC8 USB SSD. Not only is the performance fenomenal (for a USB stick at least), but it really behaves like a SATA SSD – to the point where you can use tools like hdparm and smartctl on it (yes, it even supports SMART).